Part 2: Adding Decals
Part 2 – Adding Decals: Enhance Your Model Details!
Discover expert tips for applying decals perfectly on your model vehicles and figurines. Get crisp, realistic results for scales 1:160, 1:120, 1:220, and 1:87. Ideal for hobbyists and collectors.
→ Learn to add decals like a pro now!
Hello and welcome to yet another part of the painting process: Adding the decals!
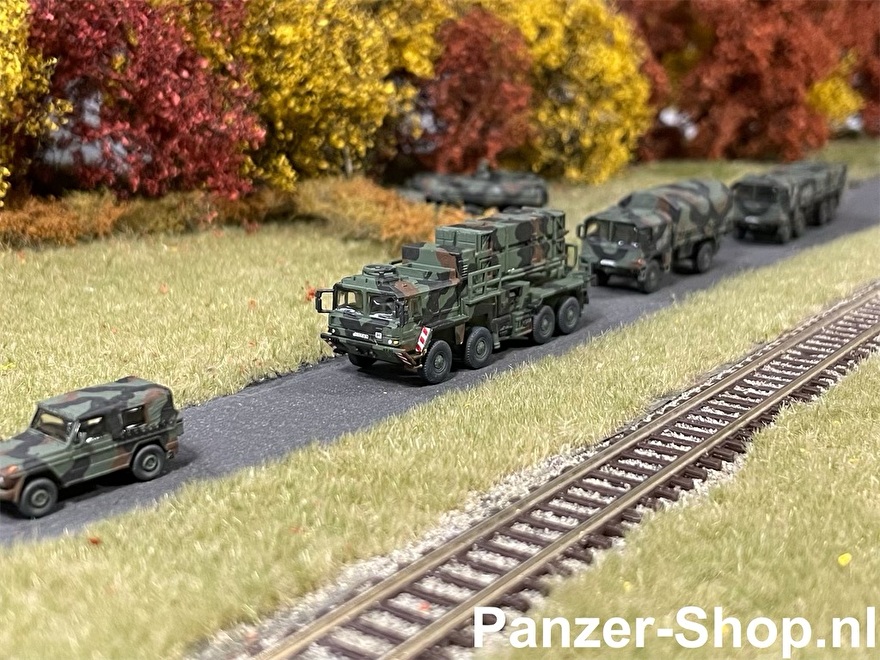
To make your models as realistic as possible you of course want license plates and insignias to be present on your models. In this case we will be giving our MAN KAT1A1 Patriot vehicle the decals it needs to look as realistic as possible.
The steps are the same for every piece of decal, so i will explain it once and then you can do it as many times as needed!
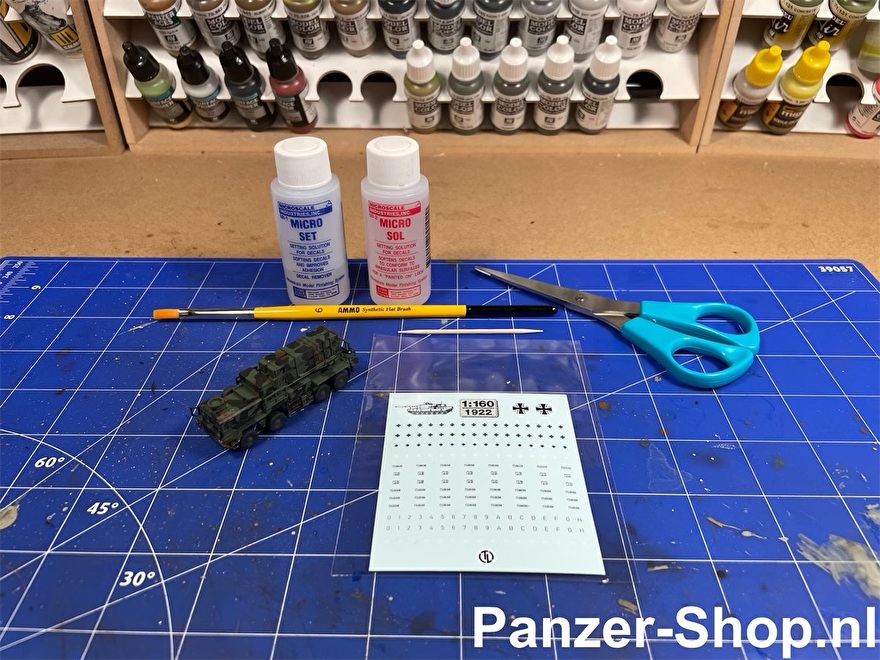
Step 1: Selection And Preparation
The first step is to asses which decals you will be using. We offer a wide range of high quality decals in 1:160, N-Scale and 1:120, TT-Scale, which is sure to suit you. The nice thing about these decals is that they are very high quality, as well as that there is a cutting line around the decal, which means you dont have to cut it out precisely.
Now we cut out the decals we need for this vehicle and sort them.
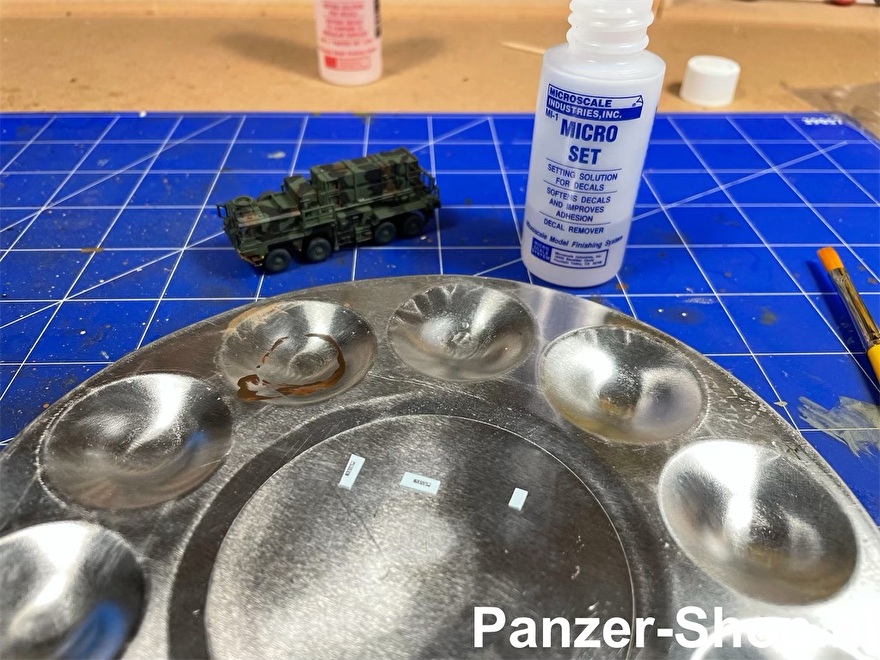
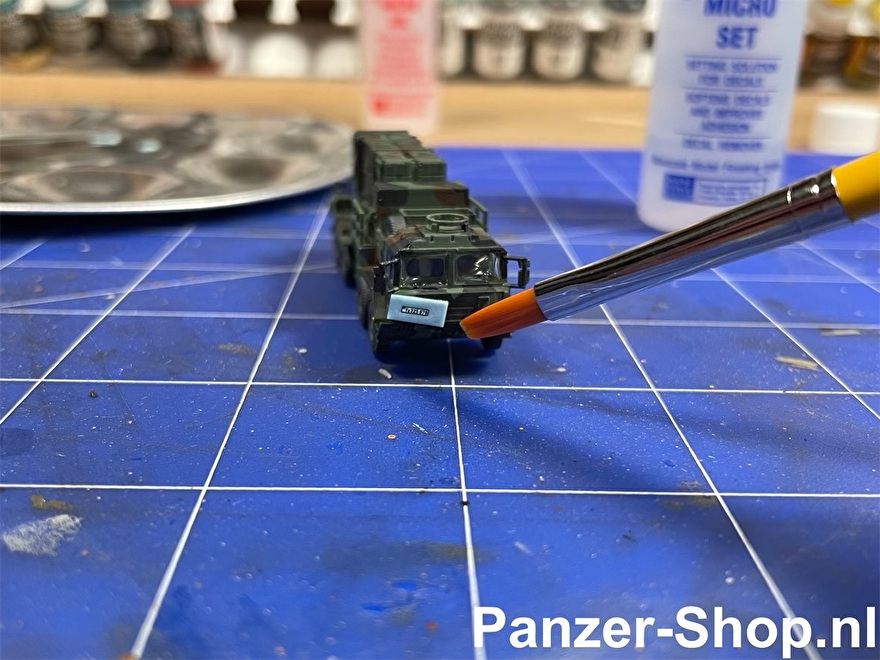
Step 2: Adding The Decals
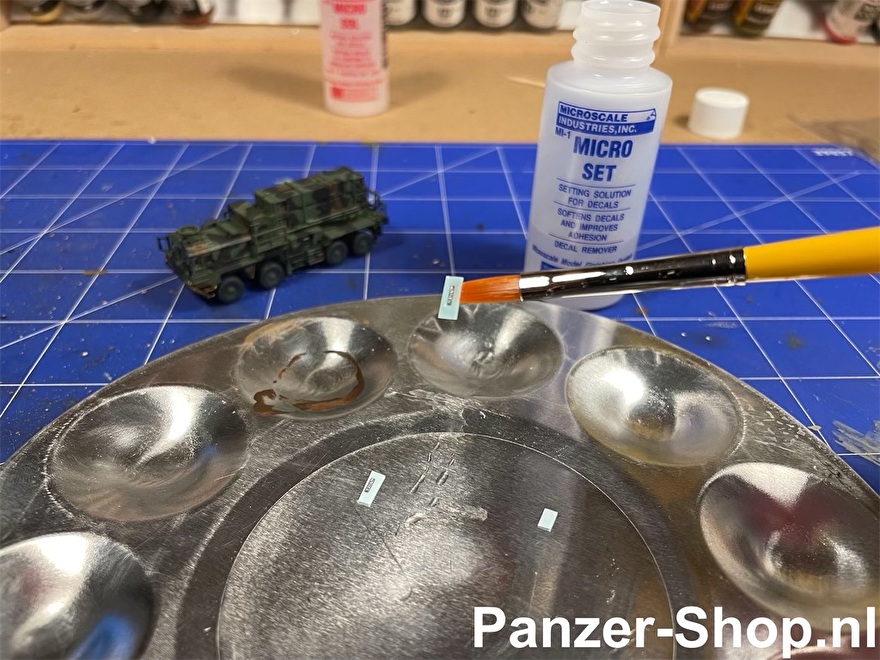
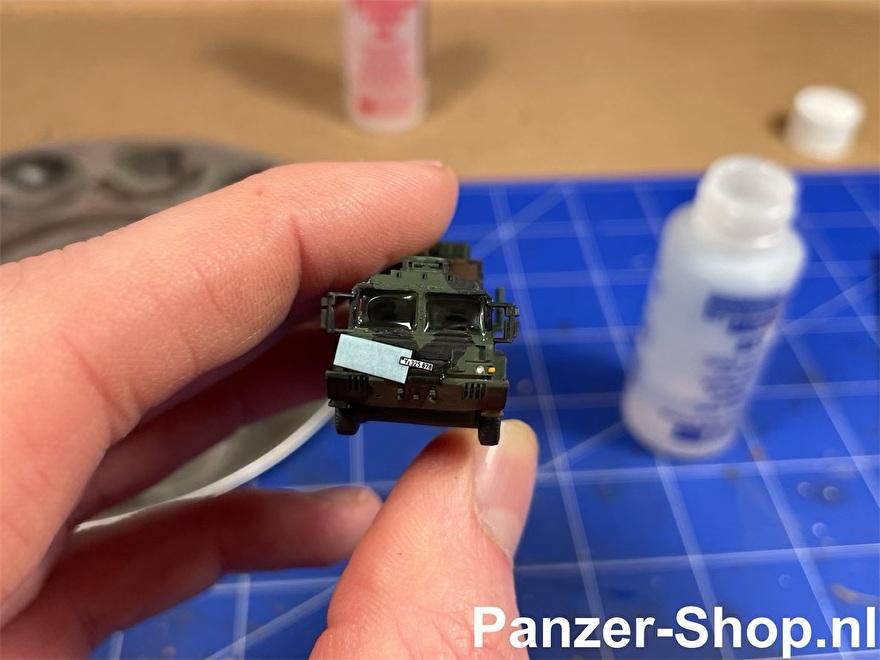
We will now get a brush, and dip it in Microscale Micro Set, which is in the blue bottle. This is a special fluid to soften the decal, and to get it to seperate from the blue sheet that is behind it. There are more fluids that do this, but i always use this as it works very well. Once we have soaked the decal well enough we pick it up with the brush and we lay it on the vehicle. After some waiting the decal will come loose from the blue paper and we can slide it onto the vehicle, into the right place.
Now we wait until the remaining Microscale Micro Set has dissapeared and the decal should be stuck in place. Repeat this process for all of the other decals.
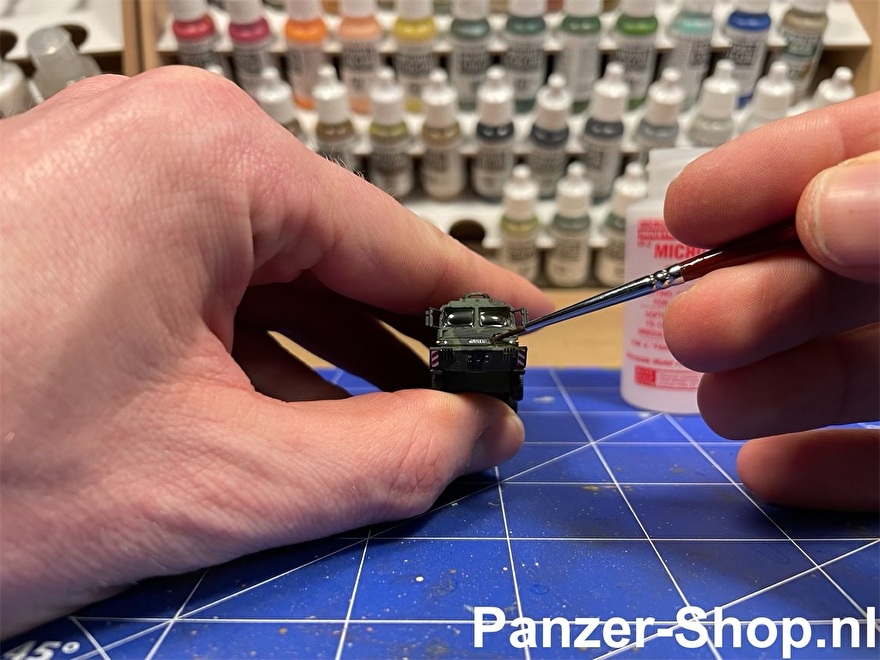
Step 3: Finishing Off
The last step will be to ensure a good look, and a firm adhesion to the model. After all of the Microscale Micro Set has dissapeared very well we get a clean brush and dip it into Microscale Micro Sol. This is the red bottle. With the wet brush we will make the decal wet again with a very quick touch. Just place a drop on it and its fine. This fluid makes the decal look more realistic. To finish it off you can apply a clear coat over the model to keep the decals in place.
For the clear coat, please note that you cannot use an airbrush for this if you already made the windows with Microscale Kristal Klear. If you put a clear coat over that it will make the window turn vague and milk-like, which will not go away.
And thats it! Now we have our model with the added decals!
Thank you and i hope to see you in another How-To!
Kevin Boogaard
Founder Of Panzer-Shop.nl