Part 4: Weathering
Weathering Techniques for Model Vehicles – Step-by-Step Guide!
Discover how to weather your model vehicles for a realistic, aged look. Our step-by-step guide offers expert tips for N scale (1:160), TT (1:120), Z scale (1:220), and H0 (1:87). Perfect for adding authenticity to your miniatures and dioramas.
Hello and welcome to the next How-To! This time we are going to talk about weathering.
Now you get into a world of almost endless possibilities regarding weathering. You can use drybrushes, washes, powders, oil brushes, spickling, rust effects and so much more.
However, today we are only going to do 2 easy and quick techniques of giving your model an extra realistic feel, and to get rid of the ''scale model'' look it has. We will look into drybrushing, and we will take a quick look into using powders to make a light dust effect.
Method 1: Drybrushing
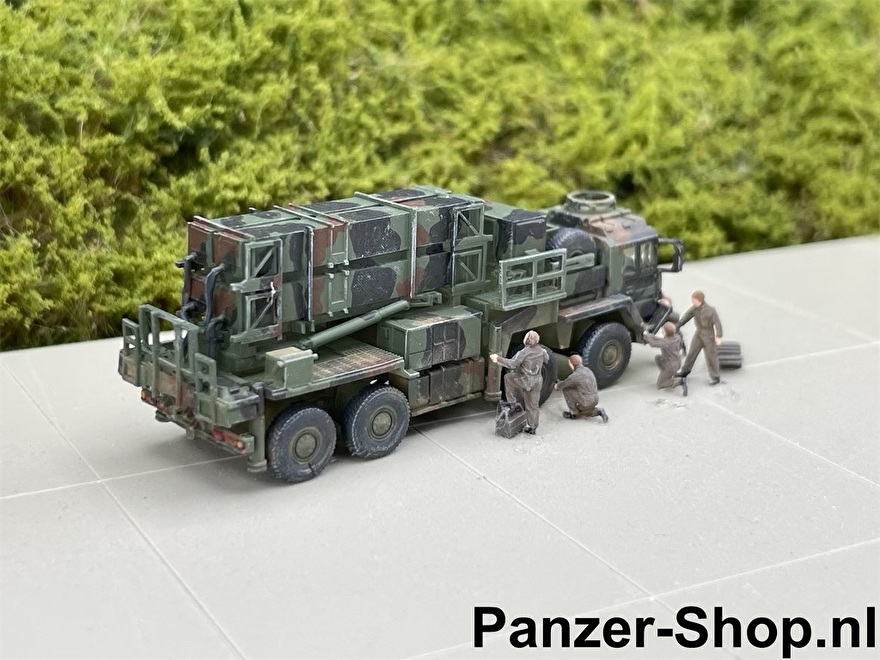
Drybrushing is a technique which is used to give the details on a scale model a bit more body. When applying this method your model will look less like its a painted model, and more like a real vehicle when you take a picture of it.
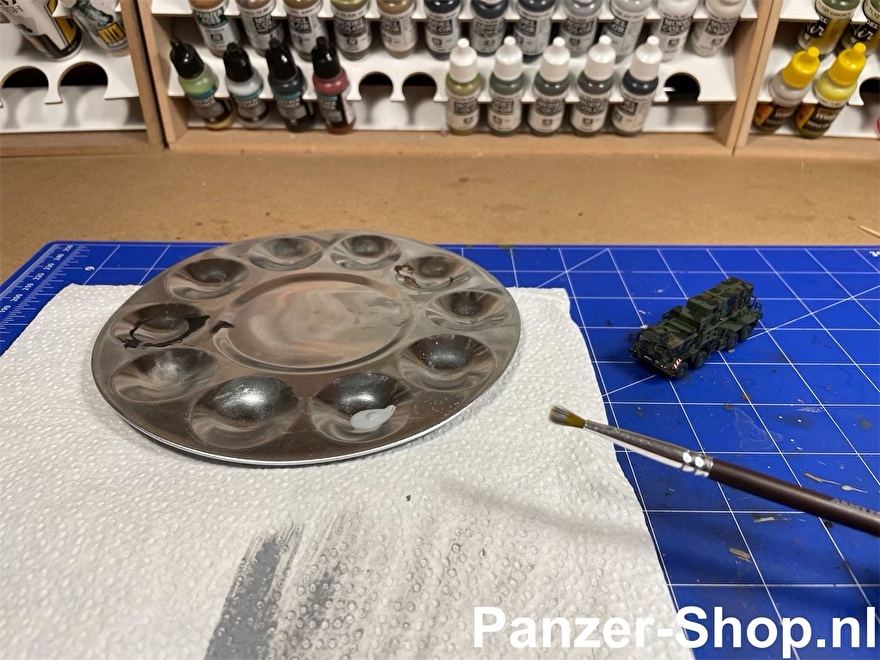
Step 1: Preparing The Paint
In this case i use 70.990 ''Light Grey'' by Vallejo. There is a whole array of options here and it comes down to your personal preference which color you use. AMMO MIG also has special drybrush paints for example, but i still prefer the standard Vallejo colors.
Apply some (not thinned) paint on your brush. Now use a patch of paper towel to wipe off 99% of the paint. You really have to keep going until you are convinced there has to be nothing left on the brush, while making sure you rotate the brush while doing it so no bits can get left on the sides.
You will now have a ''dry brush''.
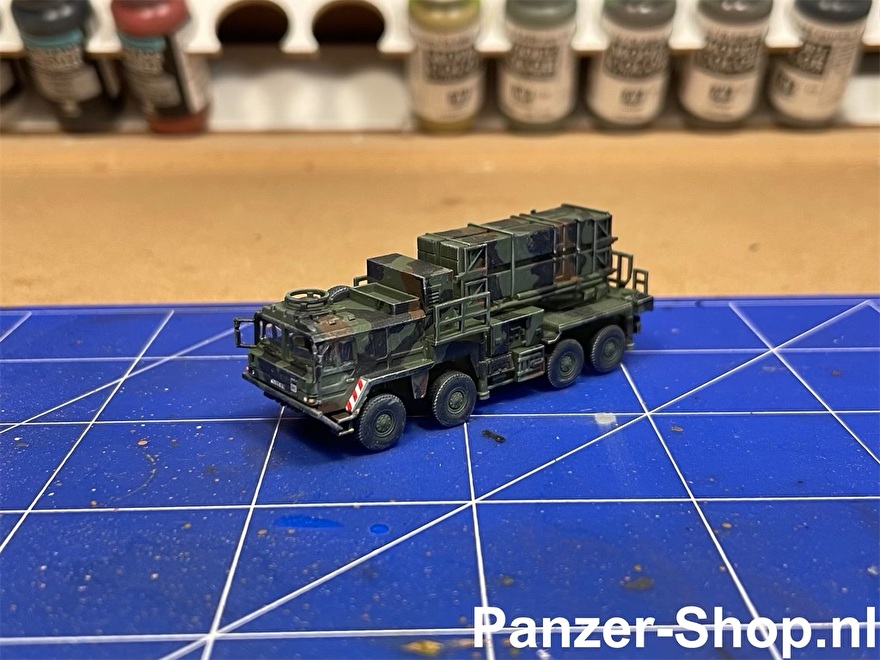
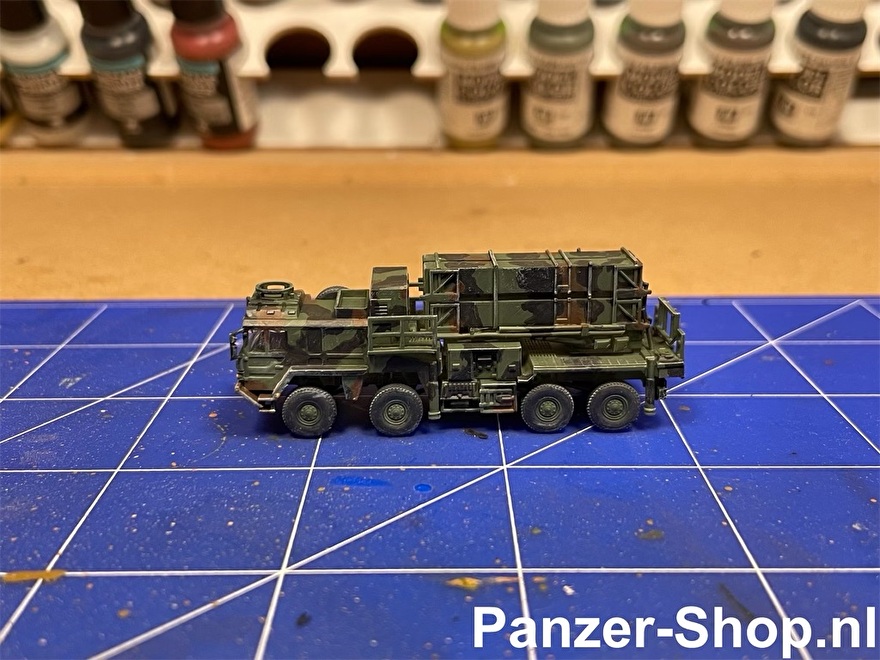
Step 2: Brushing Dry
Now use your almost empty brush to quickly brush over edges and corners. Think about edges of cabins, buttons on boxes, logos, tire profile, anything that is a detail on the model. You will see that the edges get a very thin grey layer on it, which brings the details forward.
And thats it! A simple method to accentuate the detailing on a good scale model!
Method 2: Light Dust Effects With Powders
Step 1: Mixing The Powders
We will now create a light dust effect on the model, like it has been driving over dusty terrain. When using powders its always best to use at least 2 colors and mix them. When using one you will get a more flat result with less depth to it. In this case we use A.MIG-3004 ''Europe Earth'' and A.MIG-3007 ''Dark Earth'' from AMMO-MIG. We mix them 50/50.
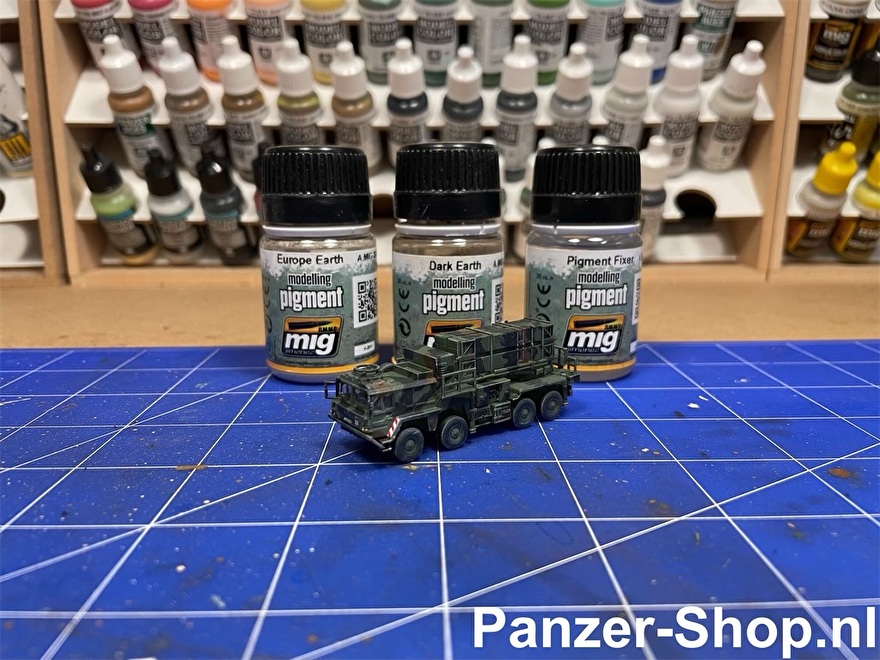
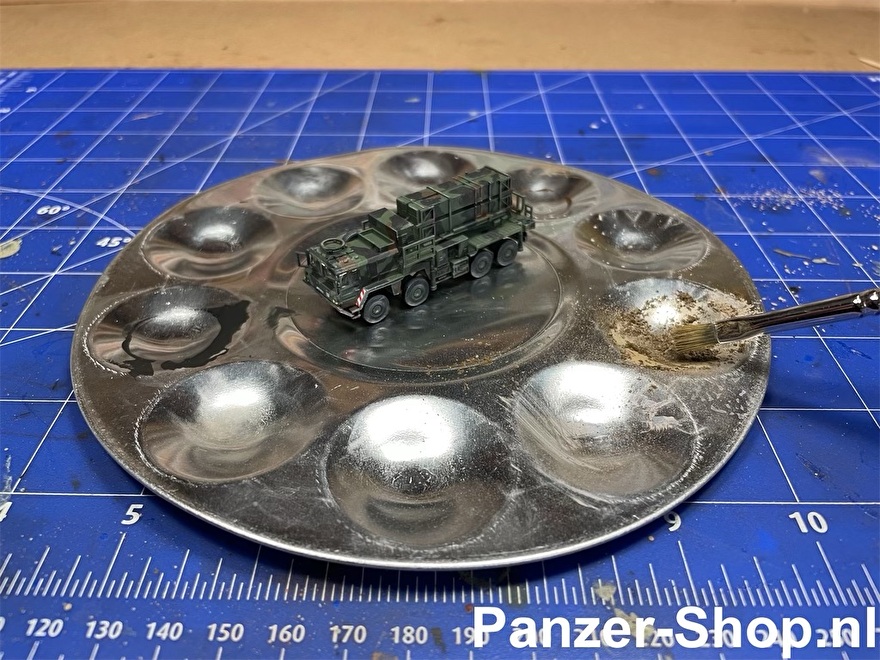
Step 2: Applying The Powder
Now we will get a relatively small brush, which we will use to apply the powder in the area where normal dust would settle. So think about flat surfaces on top of the vehicle, fenders, wheel cases, tire rims etc. You can apply a little powder, rub it in with just a touch and then blow the remaining powder away. Its very easy to use too much powder, so start with a little and build it up to your preference.

Step 3: Securing The Powder
The final step is to secure the powder into place with a Pigment Fixer. In this case i used A.MIG-3000 by AMMO-MIG. Just take a drop on the top of your brush and let it flow into the areas where dust is applied. You can do the same with a clear coating afterwards to secure the powder into place. Do not apply the clear coat with an airbrush if you already made the windows, because the windows will turn foggy which is not fixable.
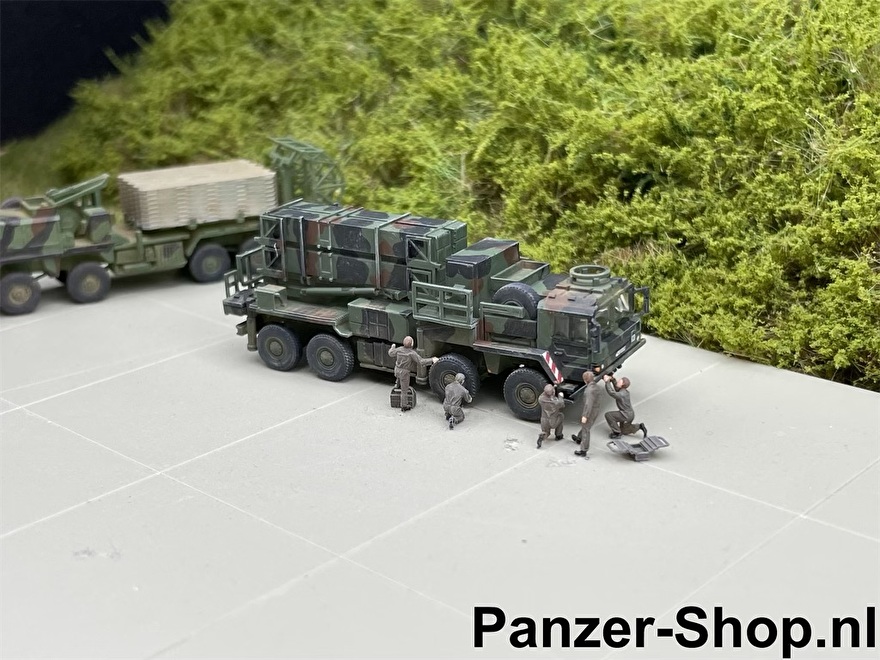
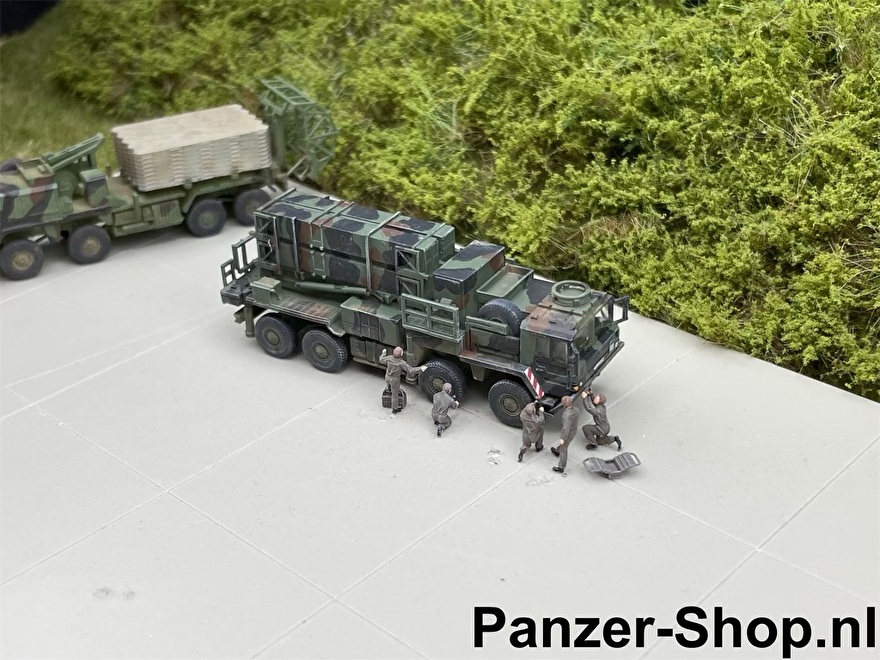
And thats it! We now have a completely finished MAN KAT1A1 Patriot Launcher, which we built together. We painted it, we made the windows, added decals and gave it some light weathering effects! Now you can perfect any of these methods to where you like them the most, but i think this is a good starting point for you.
Have fun and we would love to see the results of your work!! You can send them to us via Facebook or by emailing them to info@Panzer-Shop.nl!
Thank you and hopefully we speak soon!
Kevin Boogaard
Founder Of Panzer-Shop.nl